Complete Guide: Setting Up an Offline SQL Workspace with Azure Data Studio

If you're like me and have been looking for ways to practice SQL queries or work on personal projects on your computer without having to be connected to the internet all the time, look no further because I might have just the solution for you.
With Microsoft Azure Data Studio, you can deploy a local SQL server that enables you to work on projects locally without the internet and on the go.
PREREQUISITES
To follow this tutorial, it is required to have Microsoft Azure Data Studio installed on your computer.
You can click here, to download the latest version of Microsoft Azure Data Studio. There are different options shown below. The User installer is the recommended option.

SETTING UP AZURE DATA STUDIO
After downloading, go to the folder that contains the installer and run to launch the installation wizard.
Please read the license agreement and accept it before continuing the installation.
To accept the agreement, click the button -- I accept the agreement and click Next.

The installer installs Azure Data Studio in %AppData\Local\Programs\Azure Data Studio directory by default and requires about 600MB of disk space.

The installer creates a shortcut in the start menu folder by default.
If you do not want that, select the option -- Don't create a Start Menu Folder

The installer enables the option -- Add to PATH (requires shell restart) by default. You can check the other two options as you wish.

Click Next to review the configurations on the Ready to Install page.

Click Install to begin the installation.

After the installation has been completed, you will be presented with the page below. Click Finish to close the installation and launch Azure Data Studio.

Once the page has been closed, you will be greeted with a Welcome Page.
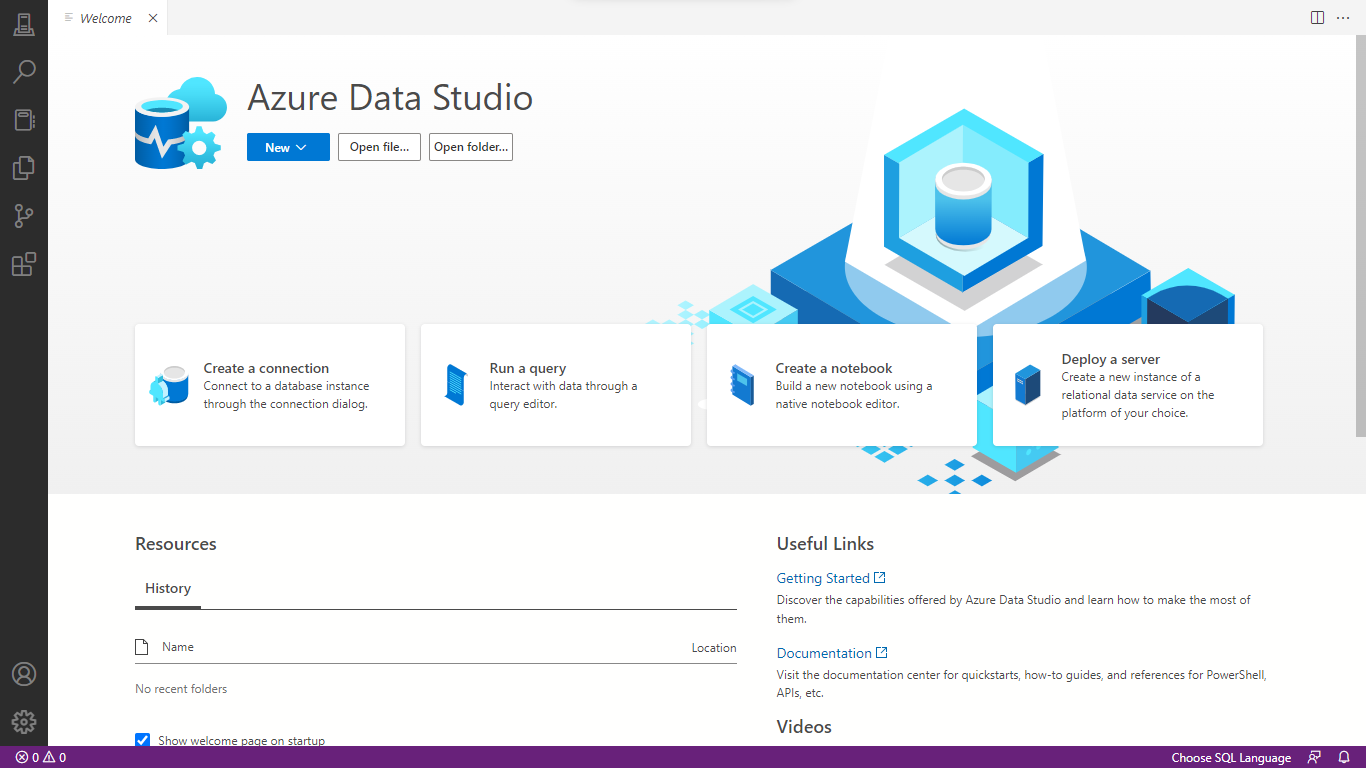
DEPLOYING A LOCAL SERVER
As seen earlier on the welcome page of Azure Data Studio, there are four options;
Create a connection
Run a query
Create a notebook
Deploy a server
We would select the Deploy a Server option to deploy a local server.

When the option is selected, you will be presented with the various deployment options below.
Since you are trying to deploy an offline server, you would click the SQL Server on Windows and press Select.

Next, you would be prompted to select which version of SQL Server you want to install from the drop-down menu. Select SQL SERVER 2022, then click Select at the bottom right of the screen.

After clicking Select, you will get a dialogue asking you to open an external website.
On the dialogue box, click Open, and the setup file for SQL SERVER 2022 will begin downloading on your web browser.

Once the setup file has been downloaded successfully, run the setup file and accept the requested permission.
Once the setup file has been downloaded successfully, open your system's download path to find and run the setup file SQL2022-SSEI-DEV.exe.
Click Yes on any security prompts shown.
The installation screen will prompt you to pick from three installation types:
Basic
Custom
Download Media
Select the Basic option for this installation.

Click Accept to accept the license terms and proceed.

Although an Install location has been specified by default, you can choose your desired install location. The installer also shows the required space for the server.
Click Install to proceed with the installation.

The installer would begin downloading the required install packages. The installation would also start immediately after the download is completed.


After successful installation, we would head back to the homepage and click the Create a connection option.
After clicking the create a connection button you will be presented with a page similar to the one below.
There are a few things to change here:
Change the connection type to Microsoft SQL Server
The input type could be either Parameters or Connection but we will be selecting Parameters for this tutorial.
Enter "localhost" in the server name.
Authentication type should be "Windows Authentication"
After all the changes have been made, click Connect at the bottom of the screen

If after clicking Connect, you are presented with an error message similar to the one shown below, click Enable Trust server certificate

Clicking that would clear the error message and should proceed with the connection to the server.
After the connection to the server, you will be shown the overview of the server which you can close.

To create a new query file and start writing queries, click on any blank space on your screen and press "Ctrl + N" on your keyboard.
This would create an SQL file that you can use to write syntax to do whatever you wish on the database.

This is the end of the tutorial and I hope this has helped you in one way or the other.
Feel free to reach out if you encounter any issues along the way, I'd be so happy to help.
Thank you and Have a good day!
